Capturing stunning portrait photos is both an art and a science. In the digital age, one crucial element that shapes the outcome is the megapixel count of your camera. But how exactly do megapixels influence the editing process of portrait photography? Is higher always better? And what practical tips can help you take full advantage of your camera’s resolution while editing? This article explores the nuanced impact of megapixels on editing portrait photos, dispels common misconceptions, and provides actionable tips to elevate your workflow.
Understanding Megapixels: More Than Just Numbers
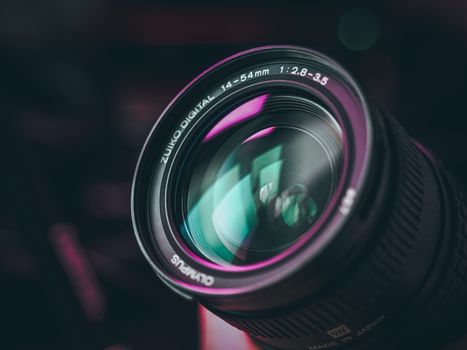
A megapixel equals one million pixels, and pixels are the tiny dots that make up a digital image. Cameras now range from modest 8-megapixel sensors to professional behemoths boasting over 100 megapixels. In portrait photography, the megapixel count directly affects image detail, cropping flexibility, and the potential for large-format prints.
But the megapixel story is not simply about bigger numbers equating to better photos. According to CIPA (Camera & Imaging Products Association), the average consumer camera in 2023 had about 24 megapixels, while flagship smartphones typically range from 12 to 108 megapixels. However, other factors like sensor size, lens quality, and image processing also heavily influence final quality.
For editing, megapixels are particularly relevant because every retouch, adjustment, or crop interacts with the underlying pixel data. More megapixels mean more data to work with—but also bigger files, heavier processing demands, and sometimes, diminishing returns. Let’s break down exactly how megapixels make a difference in editing portraits.
How Megapixels Affect Portrait Editing: The Core Impacts
1. $1One of the most significant advantages of high-megapixel images is their ability to capture remarkable detail. This is crucial in portrait editing, where skin texture, fine hair, and catchlights in the eyes can make or break a photo’s realism.
For example, a 45-megapixel portrait allows a retoucher to carefully smooth skin imperfections without losing natural pores and fine lines. Lower-megapixel images, after aggressive retouching, may appear plasticky or lose the nuanced transitions that make skin look natural.
2. $1Portrait photographers often crop to adjust composition or remove distractions. High-megapixel files provide more leeway for significant cropping while maintaining printable quality. For instance, cropping a 50-megapixel image down to a headshot still leaves ample resolution for large prints or high-quality web use. By contrast, cropping heavily into a 12-megapixel file can result in visible pixelation or soft edges.
3. $1Higher-resolution files give editors greater latitude for local adjustments and fine retouching. Advanced editing techniques—like frequency separation, dodging and burning, or selective sharpening—benefit from extra pixels, as subtle changes remain invisible at the pixel level but impactful at full view. For non-destructive editing, more data means adjustments can be pushed further before quality degrades.
4. $1It’s not all upside. A typical RAW file from a 50-megapixel camera can weigh in at 60-80MB, compared to 20-30MB for a 24-megapixel counterpart. Editing multiple high-res files demands more RAM, faster storage, and robust CPUs/GPUs. If you rely on older hardware, working with ultra-high-megapixel portraits can slow your workflow and even cause software crashes.
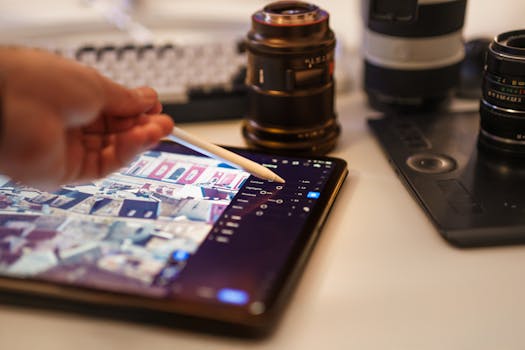
Megapixels in Practice: Portrait Editing Workflow Tips
Understanding how megapixels affect editing is only half the battle. Here are practical workflow tips to maximize quality and efficiency:
1. $1Always begin your workflow with the original, highest-resolution file. Avoid resizing or compressing until the final export. This preserves as much data as possible for retouching, color grading, and local adjustments.
2. $1High-megapixel files let you zoom in for meticulous retouching, but it’s easy to lose perspective. Frequently zoom out to full view to ensure your edits look natural. What appears perfect at 400% may seem overdone at normal size.
3. $1If your editing workflow involves 40+ megapixel files, invest in at least 16GB of RAM, SSD storage, and a recent CPU. Editing programs like Adobe Lightroom, Capture One, and Affinity Photo support large files, but performance can vary. Keep drivers and software up-to-date for optimal handling of large images.
4. $1Many editing programs offer “smart previews” or proxy workflows—lower-resolution versions for editing that link back to the full-res file for export. This speeds up editing without sacrificing final output quality.
5. $1You rarely need to export at full resolution unless preparing for large prints. For social media or web, downsizing to 2000-4000 pixels on the long edge retains detail while ensuring fast load times and manageable file sizes.
Comparing Megapixel Counts: How Much Do You Really Need?
With so many cameras on the market, it’s natural to wonder how many megapixels are ideal for portrait editing. Here’s a quick comparison of common scenarios:
| Megapixel Count | Maximum Print Size (300 DPI) | Editing Benefits | Potential Drawbacks |
|---|---|---|---|
| 12 MP | 8 x 12 in | Fast editing, smaller files | Limited cropping, less detail for retouching |
| 24 MP | 13 x 19 in | Balanced detail and speed | Some cropping flexibility |
| 45 MP | 20 x 30 in | Excellent detail, great for large prints | Larger files, needs robust hardware |
| 61 MP | 24 x 36 in | Maximum cropping, superb for commercial work | Very demanding on storage and processing |
For most portrait photographers, 24–45 megapixels strikes an ideal balance. Ultra-high megapixel cameras (50+) are best reserved for commercial or fine-art work where extreme cropping or billboard-sized prints are required.
Common Editing Challenges with High and Low Megapixel Portraits
Every workflow has its pitfalls. Here’s what to watch out for depending on your camera’s resolution:
- $1 - Over-retouching is easy since every pore and hair is visible. Resist the urge to “over clean” skin. - File management can become a headache. Organize backups and consider external drives for storage. - Sharpening artifacts or halos may become more visible—use gentle, targeted sharpening techniques. - $1 - Avoid heavy cropping; plan your composition in-camera whenever possible. - Retouching should be subtle. Aggressive edits can quickly degrade quality. - Upscaling algorithms (like Adobe’s Super Resolution or Topaz Gigapixel AI) can help, but don’t expect miracles—start with the highest quality capture.Tips and Tricks for Portrait Editing Across Megapixel Ranges
1. $1With high-megapixel files, frequency separation allows you to smooth skin while retaining pores. Use a lower blur radius for high-res images to avoid over-softening.
2. $1This classic technique benefits from more pixels, letting you apply minute, localized adjustments for sculpting facial features. In lower-res files, use larger, softer brushes.
3. $1When removing blemishes or stray hairs, high-res files let you work with tiny brushes for more precise corrections. Low-res files demand broader strokes to avoid visible smudging.
4. $1Apply sharpening selectively—eyes, hair, lips—rather than globally. High-megapixel images can tolerate more sharpening before artifacts appear, but always check at 100% and 200% views.
5. $1More pixels mean smoother gradients and less risk of color banding when adjusting skin tones or backgrounds. In lower-res files, minimize extreme color shifts and consider exporting in higher-bit formats (like TIFF) to preserve smooth transitions.
Why Megapixels Aren’t Everything in Portrait Editing
While megapixels provide tangible editing advantages, they aren’t the sole determinant of portrait photo quality. Lighting, lens choice, sensor dynamic range, and post-processing skill all play critical roles. A well-lit, thoughtfully composed portrait from a 16-megapixel camera can outperform a poorly lit, flat image from a 60-megapixel sensor.
Moreover, overly focusing on resolution can distract from the creative aspects of portrait editing: expression, mood, and storytelling. Use megapixels as a tool—not a crutch—for achieving your artistic vision.