Capturing images with a high-megapixel camera opens up a world of creative possibilities, from detailed landscapes to large-format prints. But when it comes to preserving, editing, and sharing those ultra-sharp photos, the file format you choose is crucial. Selecting the right format can mean the difference between breathtaking clarity and frustrating limitations, especially as image file sizes and post-processing demands increase with higher resolution. In this guide, we’ll walk you through everything you need to know to choose the ideal file format for your high-megapixel photos—whether you’re a hobbyist, a professional, or simply passionate about image quality.
Understanding High-Megapixel Images and File Format Needs
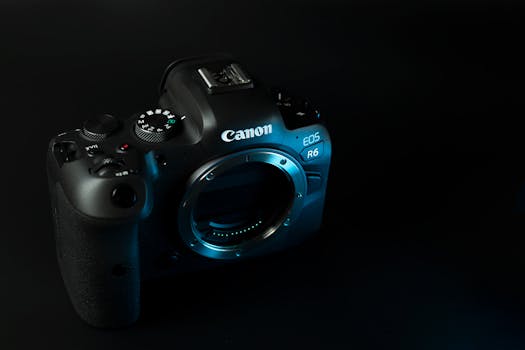
High-megapixel cameras—those offering 30, 50, or even 100+ megapixels—capture immense detail. For example, the Canon EOS R5 boasts a 45MP sensor, while the Sony Alpha 7R IV reaches 61MP. Each pixel represents a point of color and brightness data, so the higher the megapixel count, the greater the data stored per photo.
However, with increased resolution comes larger file sizes. A single uncompressed 50MP RAW file can easily exceed 60MB, while a compressed JPEG of the same scene might only be 15MB. The file format you choose not only affects storage space but also determines how much image data is preserved, how flexible the file is during editing, and how compatible it is with your workflow.
Key reasons to consider your file format with high-megapixel images: - Storage efficiency: High-res photos can quickly fill up memory cards and hard drives. - Image quality retention: Some formats compress or discard data, which can impact editing and printing. - Workflow compatibility: Certain formats work better with specific software or devices.Main File Formats for High-Megapixel Photos
Let’s break down the most common file formats used in high-megapixel photography, along with their pros and cons.
1. RAW RAW is the gold standard for professional and enthusiast photographers. It preserves all sensor data, offering maximum flexibility for post-processing. Each camera brand uses its own RAW extension (e.g., .CR3 for Canon, .NEF for Nikon), but the underlying function is the same: minimal processing and no data discarded. Advantages: - Full image data preserved (14-bit or 16-bit color depth) - Ideal for heavy editing, color correction, and dynamic range adjustments - Essential for large-format prints Disadvantages: - Large file sizes (often 40-100MB per image) - Requires dedicated software (Lightroom, Capture One, etc.) - Not universally shareable or viewable 2. JPEG JPEG is ubiquitous due to its efficiency and compatibility. It uses lossy compression to reduce file size, but some image data is lost in the process. Advantages: - Small file sizes (5-20MB for high-megapixel images at maximum quality) - Widely supported by all devices and web platforms - Quick to share and upload Disadvantages: - 8-bit color depth; reduced editing flexibility - Loss of detail and dynamic range, especially after multiple saves - Compression artifacts may be visible in ultra-high-resolution prints 3. TIFF TIFF (Tagged Image File Format) is favored for professional printing and archiving due to its lossless compression and support for high bit depth. Advantages: - Lossless, high-quality images (up to 16-bit color) - Compatible with most editing and printing software - Can contain multiple layers and metadata Disadvantages: - Extremely large files (often 100MB+ for high-megapixel images) - Not ideal for web or casual sharing - Limited camera support for direct TIFF capture 4. HEIF/HEIC HEIF (High Efficiency Image File Format) and its Apple-specific variant, HEIC, offer better compression than JPEG with higher image quality. Advantages: - Smaller files than JPEG with similar or better quality - Supports 10-bit color depth - Used by newer smartphones and some cameras Disadvantages: - Limited support on non-Apple devices and older software - Not standardized across all camera brands 5. DNG (Digital Negative) DNG is an open-source RAW format developed by Adobe. Some cameras can shoot directly in DNG, while others convert proprietary RAW files to DNG for easier archiving. Advantages: - Preserves all RAW data - Open standard, less risk of future incompatibility - Supported by most editing software Disadvantages: - File sizes similar to proprietary RAW files - Not all camera-specific metadata is retainedComparing File Formats: Quality, Size, and Usability
Understanding the differences between formats is easier with a side-by-side comparison. Here’s how the top options stack up for a 50-megapixel image:
| Format | Average File Size (50MP) | Color Depth | Compression | Best Use Case |
|---|---|---|---|---|
| RAW | 60-100MB | 14-16 bit | None/Lossless | Editing, archiving, printing |
| JPEG | 10-20MB | 8 bit | Lossy | Quick sharing, web, casual use |
| TIFF | 100-200MB | 16 bit | None/Lossless | Professional printing, archiving |
| HEIF/HEIC | 8-15MB | 10 bit | Lossy/Lossless | Mobile, efficient storage |
| DNG | 60-100MB | 14-16 bit | None/Lossless | Archiving, editing |
Key takeaway: If your priority is ultimate image quality and editing flexibility, RAW or DNG is best. For sharing and quick use, JPEG or HEIF may be suitable, but be aware of their limitations, especially for high-megapixel files destined for print.
How Your Photography Goals Influence File Format Choice
The right file format isn’t one-size-fits-all—it depends on your end goals. Let’s explore common scenarios and the best matching formats:
- Professional editing and retouching: RAW or DNG is essential. These formats retain all sensor information, allowing for advanced adjustments in exposure, white balance, and color grading without degrading the image. - Large-format or fine art printing: TIFF is often used as an intermediary between RAW capture and print. After editing the RAW, save as 16-bit TIFF for maximum quality and compatibility with print labs. - Quick sharing or online posting: JPEG is hard to beat for sheer convenience, but always export at the highest quality setting to minimize visible compression artifacts. HEIF/HEIC is an emerging option for mobile sharing, provided your platform supports it. - Long-term archiving: DNG offers future-proofing since it’s an open standard, while TIFF is also considered archival-safe due to its lossless nature. - High-volume event or sports photography: JPEG may be preferable when you need to shoot and deliver hundreds or thousands of images quickly. However, keep in mind the potential for lost detail.Storage, Speed, and Workflow Considerations
Shooting with high-megapixel cameras pushes the limits of memory cards, drives, and computers. Here’s what you need to know:
- Storage requirements: A 64GB card holds roughly 1,000 JPEGs from a 45MP camera, but only about 600 RAW files. For a full day of high-res RAW shooting, a 256GB card or larger is recommended. - Backup strategy: With larger files, offloading and backing up images becomes more time-consuming. Invest in fast external SSDs and cloud storage for redundancy. - Editing speed: RAW and TIFF files demand more from your computer’s RAM and processor. If you notice sluggishness, consider upgrading your hardware or using lower-resolution previews during editing. - Transfer and sharing: JPEG and HEIF are much faster to transfer, especially over wireless or limited bandwidth connections.Before choosing a file format, assess the capacity of your gear and the demands of your workflow. When in doubt, consider shooting in RAW+JPEG mode, which gives you a high-quality file for editing and a smaller file for immediate use.
Future-Proofing Your High-Megapixel Photo Library
File format decisions today can impact your ability to access, edit, and print your photos years from now. Here’s how to safeguard your high-megapixel images:
- Avoid proprietary RAW formats for long-term storage unless you also save a DNG or TIFF copy. Camera manufacturers sometimes discontinue support for older RAW types. - Regularly update your editing software to ensure ongoing support for current formats. - When archiving, use formats with widespread industry support (TIFF, DNG). - Keep multiple backups in different locations and consider cloud storage with file versioning.According to a 2023 survey by Backblaze, the average hard drive failure rate is 1.46% annually. That means over a decade, your risk of drive failure is significant—making robust backup strategies essential for high-value, high-resolution photo collections.
Final Thoughts on Choosing the Right File Format for High-Megapixel Photos
Choosing the right file format for high-megapixel photos is about balancing quality, storage, editing needs, and future accessibility. For most photographers, capturing in RAW (or DNG) provides the best foundation for editing and archiving, while exporting to JPEG or HEIF serves everyday sharing. For fine art printing or critical work, TIFF offers unparalleled fidelity. Always consider your workflow, storage infrastructure, and long-term needs when making your choice. With the right approach, your high-megapixel images will retain their impact—now and for years to come.